Remix IDE Basics
The Remix IDE is a browser based integrated development environment for developing and deploying smart contracts. On this page, I will show how to set up the platform for a new developer, as well as go over the environment's features.
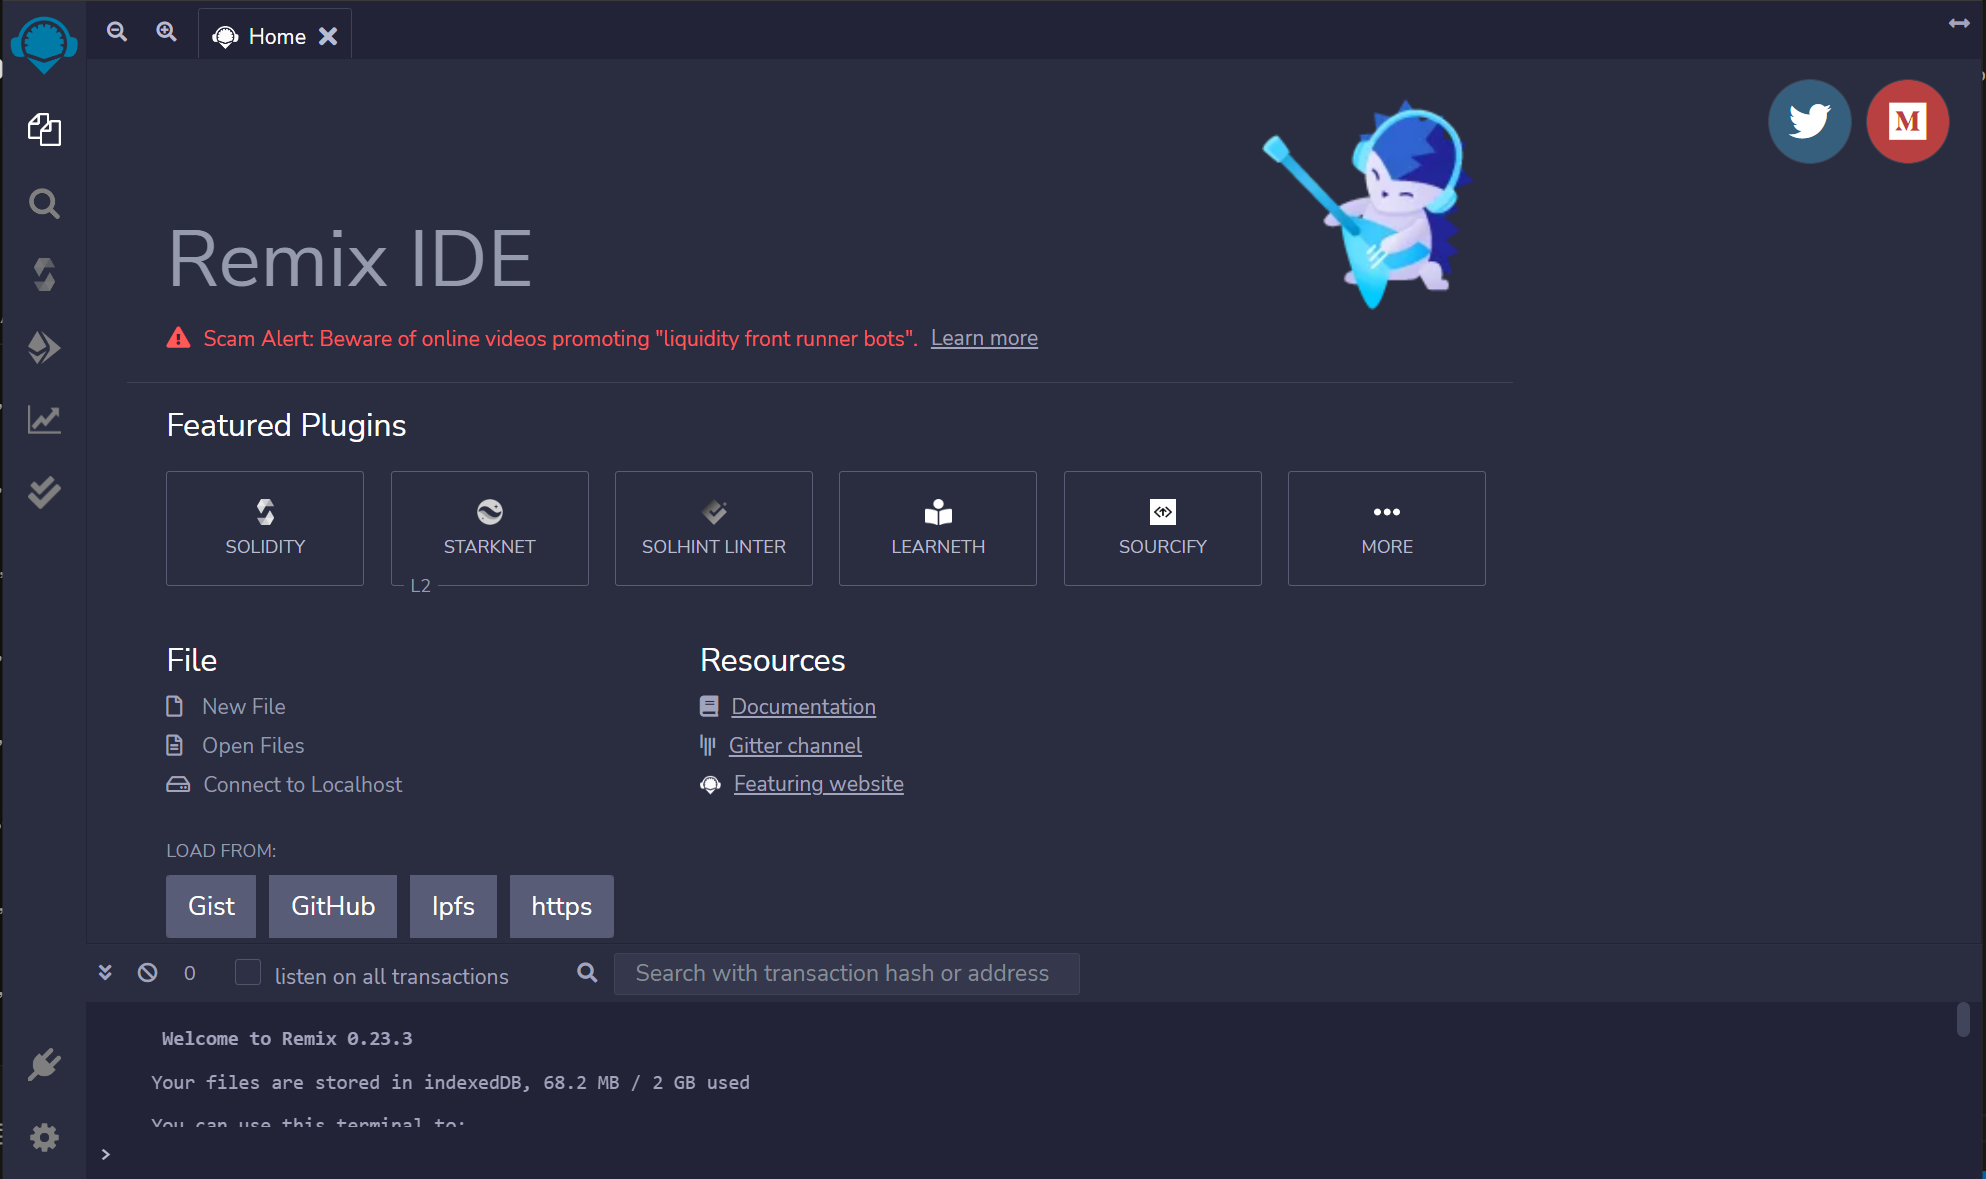 To access Remix in your browser, begin by navigating to
 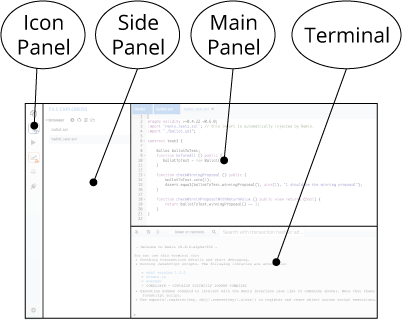 We'll start with the 3 main panels. Starting
on the left, we have the icon panel. This is where we can find icons for various plugins. Next is the side panel,
where most GUI's for plugins can be found. Next, all the way on the right, is the main panel which shows open code
and lists tabs for each open file a the top of the panel, similar to a web browser. Lastly at the bottom we have the terminal, this is
where we see all transaction information You can also run scripts here.
We'll start with the 3 main panels. Starting
on the left, we have the icon panel. This is where we can find icons for various plugins. Next is the side panel,
where most GUI's for plugins can be found. Next, all the way on the right, is the main panel which shows open code
and lists tabs for each open file a the top of the panel, similar to a web browser. Lastly at the bottom we have the terminal, this is
where we see all transaction information You can also run scripts here.
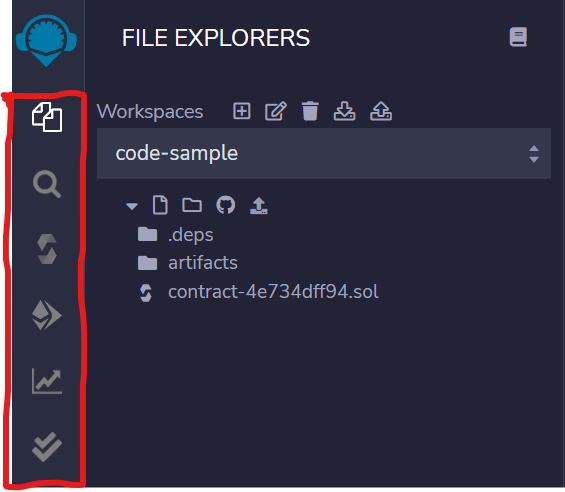 Surrounded in red we see the modules enabled by default in Remix. Going from top to bottom we have the File explorer, File search, compiler,
Deploy and run, Solitidy static analysis, and Solidity unit testing. Other modules can be enabled or disabled in the plugins manager at
the bottom of the page next to settings.
Surrounded in red we see the modules enabled by default in Remix. Going from top to bottom we have the File explorer, File search, compiler,
Deploy and run, Solitidy static analysis, and Solidity unit testing. Other modules can be enabled or disabled in the plugins manager at
the bottom of the page next to settings.
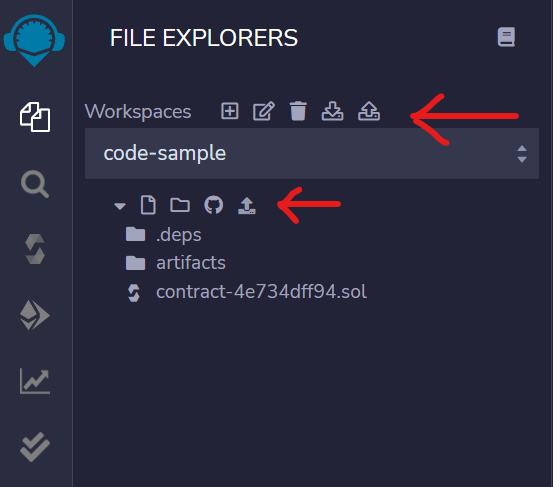 The file explorer module is where we can browse local files and make changes. Next to
the upper arrow we see our workspace buttons. Starting from left to right we have create a new workspace, rename, delete, download, or
restore a workspace. Next to the bottom arrow we have local file options. Going left to right is new file, new folder,
publish to git(must be configured in settings), and load a local file into the workspace. There are also a few pre-made
files in remix for the user to test out.
The file explorer module is where we can browse local files and make changes. Next to
the upper arrow we see our workspace buttons. Starting from left to right we have create a new workspace, rename, delete, download, or
restore a workspace. Next to the bottom arrow we have local file options. Going left to right is new file, new folder,
publish to git(must be configured in settings), and load a local file into the workspace. There are also a few pre-made
files in remix for the user to test out.
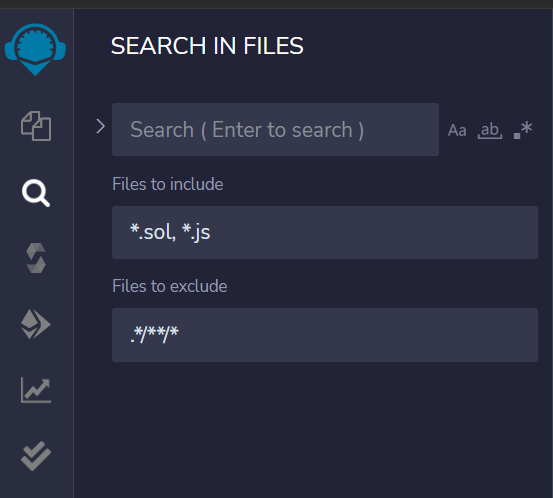 The search module is used for searching for local files and includes some filters based on file type or name.
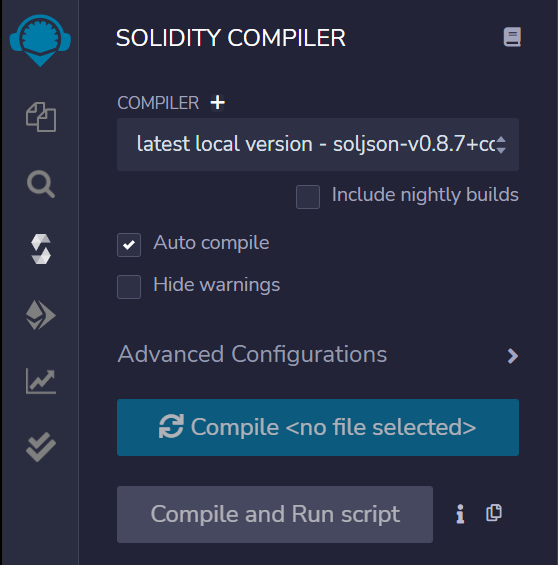 Next is the compiler module. When compiling a Solidity file, we are given a few options based on what version of
Solidity is being used. Be sure to select the correct version when compiling your script. The option to automatically
compile is given and may be useful to save the user some time. Since we have not opened any files yet, the compiler
is grayed out and displays the no file message. Secondarily, the user may choose to both compile and run. Advanced options
are available under the Advanced Configurations drop down menu. Let's open a file and see how the compiler changes!
Next is the compiler module. When compiling a Solidity file, we are given a few options based on what version of
Solidity is being used. Be sure to select the correct version when compiling your script. The option to automatically
compile is given and may be useful to save the user some time. Since we have not opened any files yet, the compiler
is grayed out and displays the no file message. Secondarily, the user may choose to both compile and run. Advanced options
are available under the Advanced Configurations drop down menu. Let's open a file and see how the compiler changes!
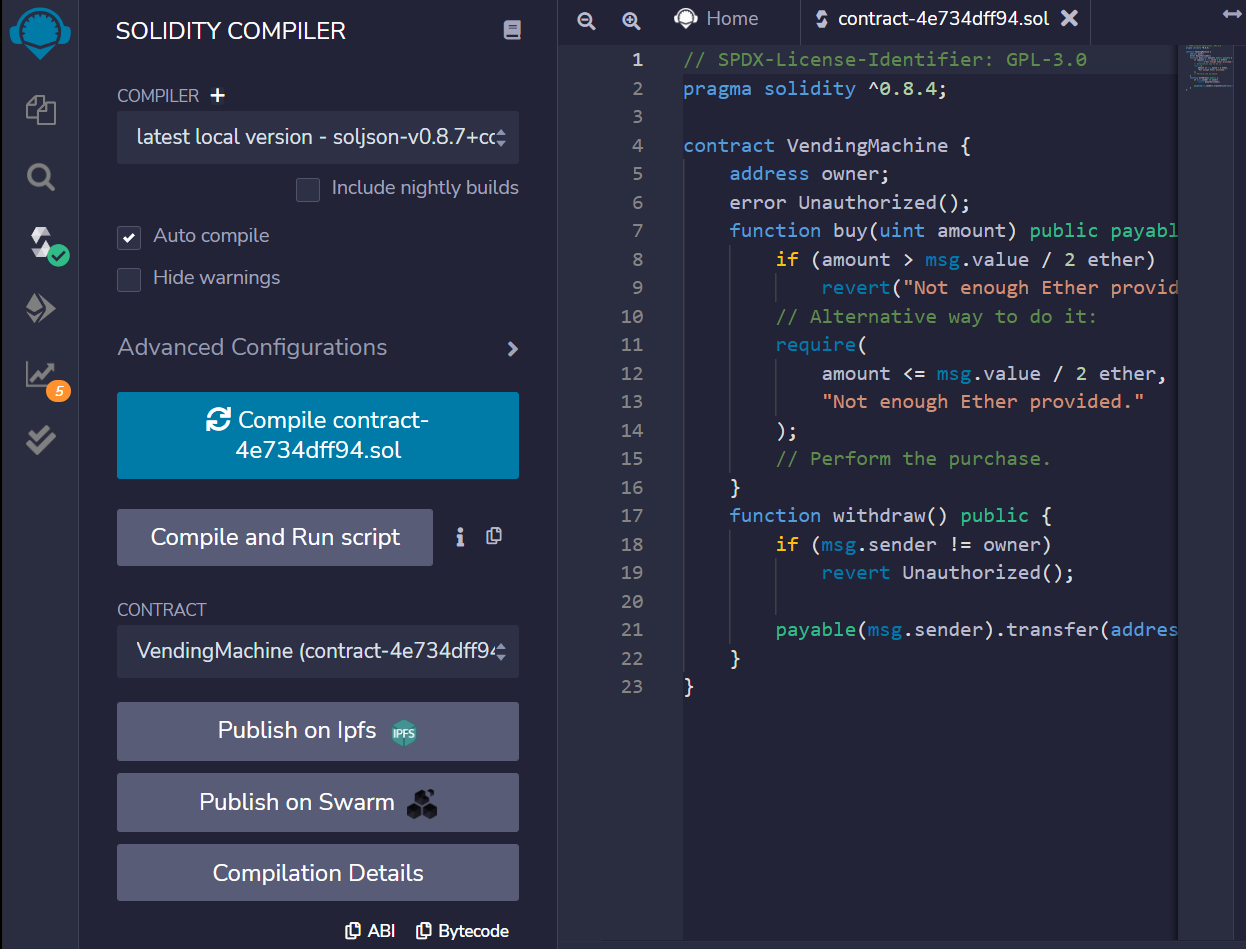 Once a file is open, there are a few changes to the compiler module. On the icon panel we see a green check mark indicating
the compiler found no issues or errors in the file. If an error is found it will display the number of errors as a red badge instead.
at the bottom there are a few new options including Publish on Ipfs, Publish on Swarm, and Compilation Details. The first two are
pushing to the two mentioned platforms, and the third is to display more details such as metadata, ABI, or Storage Layout.
Once a file is open, there are a few changes to the compiler module. On the icon panel we see a green check mark indicating
the compiler found no issues or errors in the file. If an error is found it will display the number of errors as a red badge instead.
at the bottom there are a few new options including Publish on Ipfs, Publish on Swarm, and Compilation Details. The first two are
pushing to the two mentioned platforms, and the third is to display more details such as metadata, ABI, or Storage Layout.
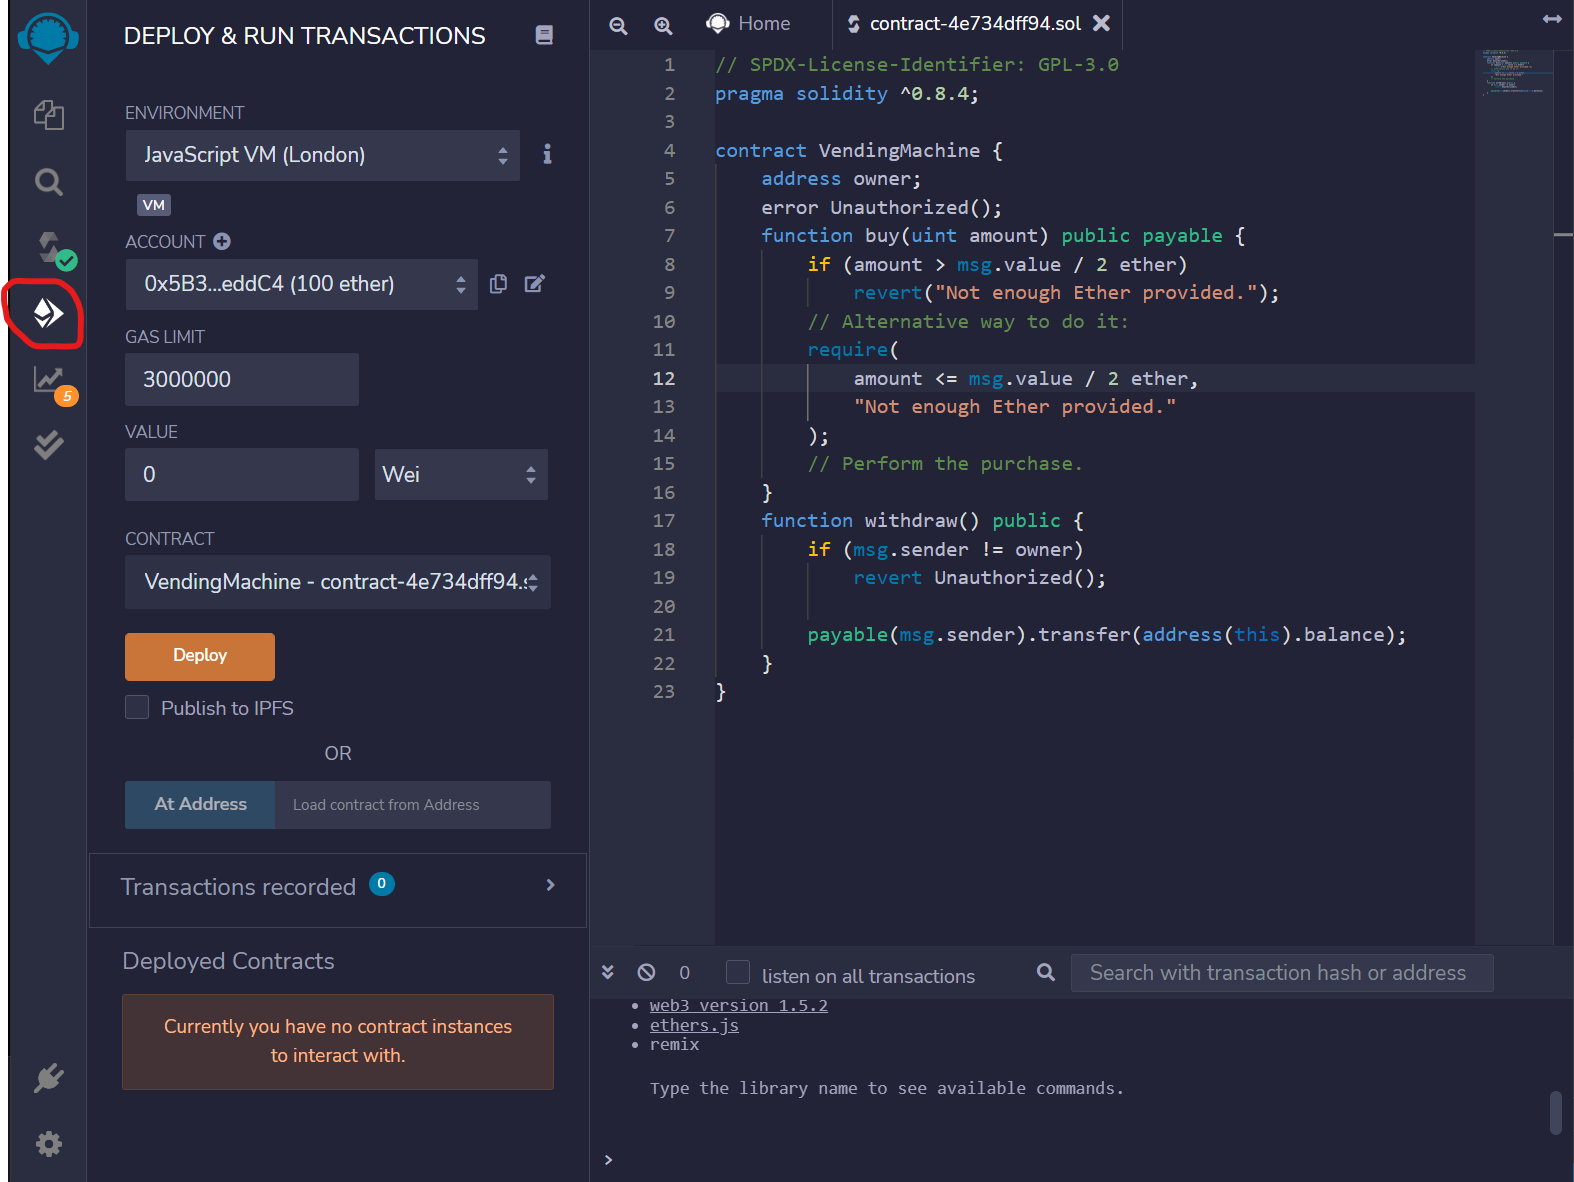 The fourth icon is the Deploy & Run Transactions module. Environment is where we can choose between a number of environments and their
attached accounts when deploying our program including, JavaScript VM, Injected Web3, Web3 Provider, Hardhat provider, Ganache provider, and
wallet connect. Account shows the wallets attached to the environment and their address. Gas limit shows the max gas fee we are willing to pay.
Value fulfills the amount of Ether sent with our transaction, not including the gas fee. Once a contract is chosen, we can then deploy, giving us
a new instance of the contract.
The fourth icon is the Deploy & Run Transactions module. Environment is where we can choose between a number of environments and their
attached accounts when deploying our program including, JavaScript VM, Injected Web3, Web3 Provider, Hardhat provider, Ganache provider, and
wallet connect. Account shows the wallets attached to the environment and their address. Gas limit shows the max gas fee we are willing to pay.
Value fulfills the amount of Ether sent with our transaction, not including the gas fee. Once a contract is chosen, we can then deploy, giving us
a new instance of the contract.
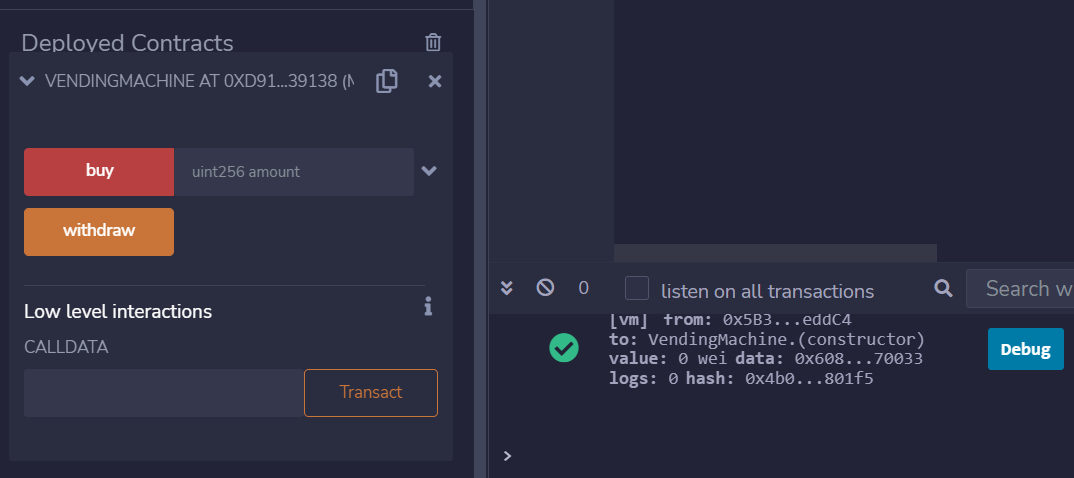 Contracts can be interacted with under Deployed Contracts. We can for example buy or withdraw an amount as shown. Transaction data
is displayed on the right.
Contracts can be interacted with under Deployed Contracts. We can for example buy or withdraw an amount as shown. Transaction data
is displayed on the right.